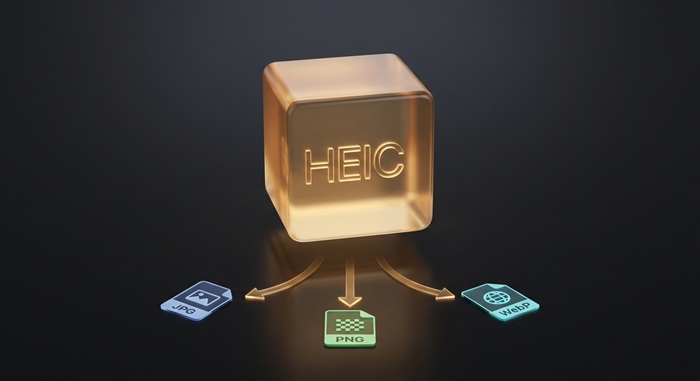
Take a photo on an iPhone and the file lands in your library as IMG_4021.HEIC. It opens fine on the phone. It opens fine on a Mac. It opens fine when you AirDrop it to another iPhone.
Then you email it to someone on Windows. They reply: "The attachment won't open."
This is the HEIC compatibility problem in one exchange. Apple switched the default photo format seven years ago. The rest of the world did not.
Why iPhones Shoot HEIC
The reason is file size. A 12 MP photo from an iPhone saves at roughly:
| Format | Typical size | Notes |
|---|---|---|
| HEIC (default) | ~1.8 MB | HEVC compression inside an ISOBMFF container |
| JPEG | ~3.5 MB | The old iOS default, pre-iOS 11 |
| ProRAW | ~25 MB | Available on Pro models, stores sensor data |
HEIC cuts photo storage roughly in half. At 50 GB of iCloud storage (the free tier), the difference between HEIC and JPEG is about 14,000 extra photos. Apple sells storage upgrades. The business incentive was never subtle.
The compression underneath is HEVC (H.265), the same codec used for 4K Blu-ray and streaming video. HEVC is roughly twice as efficient as JPEG's DCT-based compression at the same visual quality, and it handles 16-bit color depth, which JPEG (8-bit) cannot do. On a technical level, HEIC is a better format. For a deeper dive into the byte-level structure, our HEIC technical deep dive walks through ISOBMFF boxes and file signatures.
The trade-off was compatibility, and that trade-off still has not resolved.
Where HEIC Still Breaks
| Environment | HEIC support | Workaround |
|---|---|---|
| iPhone (iOS 11+) | Native | None needed |
| Mac (macOS High Sierra+) | Native | None needed |
| Windows 10/11 | Requires HEIF Image Extensions ($0.99 from Microsoft Store, or free via OEM bundle) | Convert to JPG |
| Windows 7/8 | None | Convert to JPG |
| Android 9+ | Native (varies by manufacturer) | Convert if broken |
| Chrome/Firefox/Edge | No HEIC rendering in <img> tags | Convert before web upload |
| Safari (macOS/iOS) | Renders HEIC natively | None needed |
| Adobe Photoshop | Requires Camera Raw 11.2+ | Convert first, or update |
| Most CMS (WordPress, Squarespace) | Converts on upload, strips metadata | Upload original, let CMS convert |
| Email attachments | Recipient's device determines compatibility | Convert before sending |
| Social media (Instagram, X, Facebook) | Convert server-side on upload | Platforms handle it on their end |
The browser column is the painful one. Chrome, Firefox, and Edge together account for roughly 85% of desktop browsing. None of them display a HEIC file in an <img> tag. If you run a website and a user uploads a HEIC photo, it will not render until your backend converts it.
Three Ways to Handle HEIC Files
1. Change Your iPhone Camera Setting
The nuclear option. Go to Settings → Camera → Formats and switch from "High Efficiency" to "Most Compatible."
What this does: the Camera app saves photos as JPEG instead of HEIC. Videos save as H.264 instead of HEVC. File sizes double. Compatibility problems disappear.
When to do this: if you regularly send photos to Windows users, upload to web apps that choke on HEIC, or work with software that has not been updated since 2017. The storage cost is real (a 256 GB iPhone shooting JPEGs fills up noticeably faster) but the friction cost of converting every photo may be higher.
When not to: if you mostly share within the Apple ecosystem, if you use iCloud Photo Library (which handles format conversion transparently when exporting), or if storage space matters more than occasional compatibility issues.
2. Convert After Shooting
Leave the camera on High Efficiency. Convert photos when you need to share them outside the Apple ecosystem. This keeps the storage savings of HEIC where it matters (on your phone) and the compatibility of JPEG where it matters (everywhere else).
Our HEIC to JPG converter runs in your browser. Drop a folder of HEIC photos, get a folder of JPEGs back. No upload, no account, nothing to install. The converter decodes each HEIC file with a WebAssembly build of libheif (the same C library that powers HEIC support on Linux) and encodes the output as JPEG at 90% quality, which is visually indistinguishable from the source on any screen.
Quality notes:
- The conversion is from one lossy format to another. The output JPEG is about 2× larger than the source HEIC at the same visual quality. This is normal: JPEG needs more bits to hit the same perceptual threshold.
- Converting to PNG instead (HEIC to PNG) gives you a lossless file, but at 5–8× the original HEIC size. Useful if you plan to edit the photo further, wasteful if you are just sharing it.
- Converting to WebP (HEIC to WebP) gives you a file roughly the same size as the HEIC source with broad browser support (Chrome, Firefox, Edge, and Safari 14+ all render WebP).
3. Use iCloud's Built-in Export
When you export photos from the Mac Photos app or iCloud.com, you get a format choice. "Export Unmodified Original" gives you the HEIC file as-is. "Export as JPEG" converts on export.
This works for occasional sharing. It does not work for batch operations: exporting 200 photos one at a time through the Photos app is an exercise in patience. For large batches, a dedicated converter is faster.
HEIC vs HEIF: the naming confusion
Apple calls the format HEIC. The standard is called HEIF (High Efficiency Image File Format, ISO/IEC 23008-12). The distinction:
- HEIF is the container standard. It can hold still images, image sequences (bursts), and image collections.
- HEIC is Apple's brand for HEIF files containing HEVC-encoded images. The
.heicextension is an Apple convention. The standard.heifextension exists but almost nobody uses it. - HEIF files can also contain AVC (H.264) or AV1-encoded images. Apple chose HEVC because they already used it for video and had the licensing sorted.
In practice, .heic and .heif files are structurally identical (they are both ISOBMFF containers) and tools that handle one handle the other. The difference is only the brand marker in the ftyp box: heic vs heif vs mif1.
What Happens to Metadata During Conversion
HEIC files carry EXIF metadata in an Exif item inside the meta box. When our converter decodes a HEIC file to raw pixels and re-encodes it, that metadata is not carried over. The output file contains compressed pixels and nothing else.
This is a feature, not a bug, for most sharing use cases. Your iPhone embeds GPS coordinates, timestamps, camera serial numbers, and sometimes a thumbnail of the unedited image into every HEIC file. Sharing the original means sharing all of that. Our EXIF privacy guide covers the full list of what is in there and how to read it yourself.
If you need to preserve metadata (for archiving or professional workflows), use Apple's export tools or a metadata-aware converter like ExifTool.
Batch HEIC Workflow
The most common workflow: you have a folder of HEIC photos and need JPEGs for a client, a CMS, or a sharing platform.
- Open HEIC to JPG.
- Drag the folder onto the drop zone. All
.heicand.heiffiles are queued; non-HEIC files are skipped with a clear label. - Adjust the quality slider if needed (default 90 works for nearly everything).
- Wait for processing. A folder of 200 photos takes about a minute on a modern laptop.
- Download individually or as a single ZIP.
The same workflow works for PNG and WebP output via the corresponding converter pages. See our batch conversion tutorial for the full breakdown including format selection, quality trade-offs, and browser-specific download behavior.
The Short Version
- HEIC saves storage. It breaks everywhere except Apple devices and Android 9+.
- If you share photos outside the Apple ecosystem regularly, switch the camera to "Most Compatible" (JPEG) or batch-convert before sending.
- For occasional sharing, iCloud export works. For batches, a browser-based converter is faster and keeps the files on your device.
- Converting to JPG is the safe default. WebP is smaller with broad browser support. PNG is for editing workflows, not sharing.
- Metadata does not survive conversion, which is usually what you want when sharing photos publicly.